Showing posts with label Paper. Show all posts

13 November 2013

DIY instagram calendar

Thank you for all your sweet words about the ball photos. We had the best time!

It's November but I'm thinking about Christmas and wanted to share over the next few weeks a few simple ideas for handmade gifts.
I love buying presents but I also enjoy making them (although handmade presents for teenage brothers may not go down so well)

This was a DIY I made a couple of months ago for a friends birthday but I think it would work really well as a christmas present.
A simple flip instagram calendar for the New Year.


You will need: 
Instagram photos
Thick A3 card
3 jump rings


1. Find a selection of instagram photos. I wanted to use photos from my friends feed so I logged into ink361 searched for her in my followers and then saved her photos.
Obviously the quality won't be as great as if you took them directly from the phone but if it is a surprise, needs must!

2. Open up a simple photo editing software. I used photoshop but any web based one would work just as well. Choose thirty one photos and add the numbers to the centre of the photo. I made the number quite big and used the photo as the background. You could make the numbers any size you wanted though. I found white was the best colour to use and used this font.


Then do the same with twelve different photos and add the months of the year.

Repeat with the days of the week on seven new photos. To keep things fresh I did fourteen days of the week cards so that it would be on a rolling two week cycle! You don't want to be bored...

3. Once you have edited and saved these photos you need to print them as square photos. I printed mine at 3x3. There are many different ways to print. On photoshop I opened up a 6x4 canvas then added the photos side by side and saved them as a new file. I then ordered these as 6x4 prints online and trimmed them when they arrived.

4. This is the fun bit! You will need a piece of pretty sturdy, thick white card. Most good stationary shops have some. Mine was A3 size.
Holding the card horizontally fold into three equal sized pieces and then an inch flap like this. Score along the folds.


5. Now get your three jump rings. Open them up and place them evenly along the top fold in the card just like this. They can take a bit of fiddling to get them in.


6. Grab your photos. Depending on what you printed them on you could leave them as they are or do as I did and back them onto some thin card for extra strength. I then punched a hole in the top of each photo.

7. Glue your the stand together. Fold along the scored lines to form a prism shape and secure with that inch flap you created and a bit a of super glue.


8. If you want to decorate the stand this is the time to do it. Grab each pile of photos- the months, the numbers and the days. Make sure they are in order! Open each jump ring and attach to the stand in whichever order makes sense to you. I did day of the week, date and then month.


Such a fun gift and simple to make! Enjoy.

15 September 2013

the student makes - diy marble paper

Welcome to another post on my mini series "the student makes". I am trying to create a collection of simple and cheap DIY's that use many things you may have on hand already. 

This DIY has been floating around the web recently and I was itching to have a go. I almost feel like it is cheating to post a tutorial because it is just so easy! 


Supplies: (I have estimated cost because you will probably have a lot of these things lying around at home) 
Three or more different coloured nail polishes: free or you can probably pick some new ones up for a £1.00 a bottle.
Cocktail sticks: £1.00
Card, paper, tags or anything you want to marble.

An icecream tub or similar and some old newspaper to dry your creations on.


1. Fill your plastic tub up with a few inches of water. Unscrew the lids of your nail varnish. You have to work quickly with this DIY so preparation is the key.


2. Drizzle your first colour nail varnish across the surface of the water. The first colour will spread the most so it will be the most dominant on your finished piece.
Quickly drizzle your second and third colours across the water.

At this stage if you want to create a very swirly effect grab a cocktail stick and swirl the nail polish. You have to be quick to do this though or the polish will just stick in a clump.


3. I found it best to fold my card in half, then holding one half of it, making sure it is flat against the water, dip. The nail polish will cling to the paper and when you pull it out you end up with patterns like this. 

Leave your cards to dry and keep on experimenting!  


This project is so versatile. You can try different colours of polish, dipping the paper in more than once or dipping other objects into the paint. 

There are also a hundred and one things to do with the finished paper. I chose to cut some of my mine into tags to wrap onto presents. I also made some into gift cards and tied them up with twine to give as a present. 


Super simple and cheap project, if a little bit messy!

31 August 2013

Paper Feather Garland

So I feel like I am sort of cheating putting this here as a DIY.
I posted this feather garland on instagram and there was a lot of good feedback so I thought I would share how I made it.

The reason I feel like I am cheating is that the feather template isn't mine. 
I used the template and tutorial for making the individual feathers from this post by Lia Griffith.

I cut mine out of plain white card and old book paper glued to card to give it a bit of extra rigidity.
I then gathered all the feathers I had created and put them together in groups of three. No rhyme or reason here. I just layered them up in ways that made me happy.


I added a dab of glue to the end of each to secure them together.
Once I had enough groups of three I tied them with a knot onto a piece of garden twine.

The feather template is beautifully designed so there is enough of a "tail" on the feathers to tie them onto the twine without glue.

I think these would look so lovely at a party strung up with fairy lights.
Whimsical and light they flutter in my room above my desk. Another garland to add to the collection.


17 May 2013

Paper Feathers

Last weekend Jennifer ran one of her fantastic blog events. She set several challenges and one of them was to be inspired to be as "free as a bird". To use bird elements and to try things outside of your comfort zone.

Here is what I created....


The feathers were so easy to draw. I just searched for drawings of feathers on the web and combined several styles, smudging and changing pens when it felt right.
I also found that the more I cut into the feathers the more realistic they looked.

I have drawn a lot in the past but hadn't for quite a while so it was a bit out of my comfort zone. It is also ironic that I absolutely hate birds so to draw feathers was interesting!
I think these would add lovely texture to a scrapbook page or as a detail on a card.

Thank you for a fun challenge Jennifer.

22 March 2013

Origami wall art


I love geometric shapes.
I am also partial to a good bit of origami. There is something intriguing about creating a series of folds that will eventually form a shape that needs no glue to hold it together.

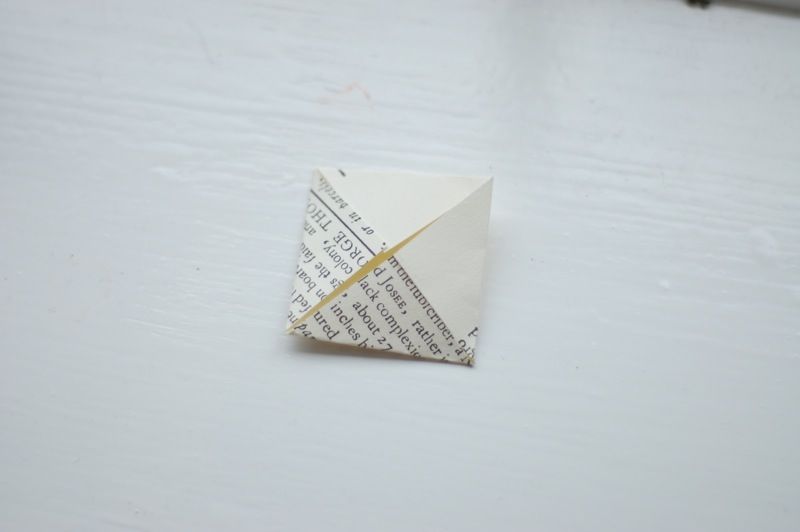
I found this tutorial the other day. These are such simple shapes to make. Officially they are a "triangular bipyramids" but I like to think of them as funky shapes.


I didn't really know where I was going with making them. They were just very addictive!
I eventually decided on stringing them on white cotton and hang them.

To do this simply grab one of your triangles and a long needle. Then choose two points on the shape and string it on.

On some I made knots so that the triangles hung on the cotton, on some they are resting on each other. I  also varied how I strung them, going through different points each time to make them hang at different angles.

I then created a loop in cotton and hung them on two tacks hammered into my wall.

They are peaceful floating there on my wall. Colourful and delicate geometric shapes.


21 December 2012

DIY Paper Starburst

Each year I make a decoration for the Christmas day table. Something little to go on everyones plate.

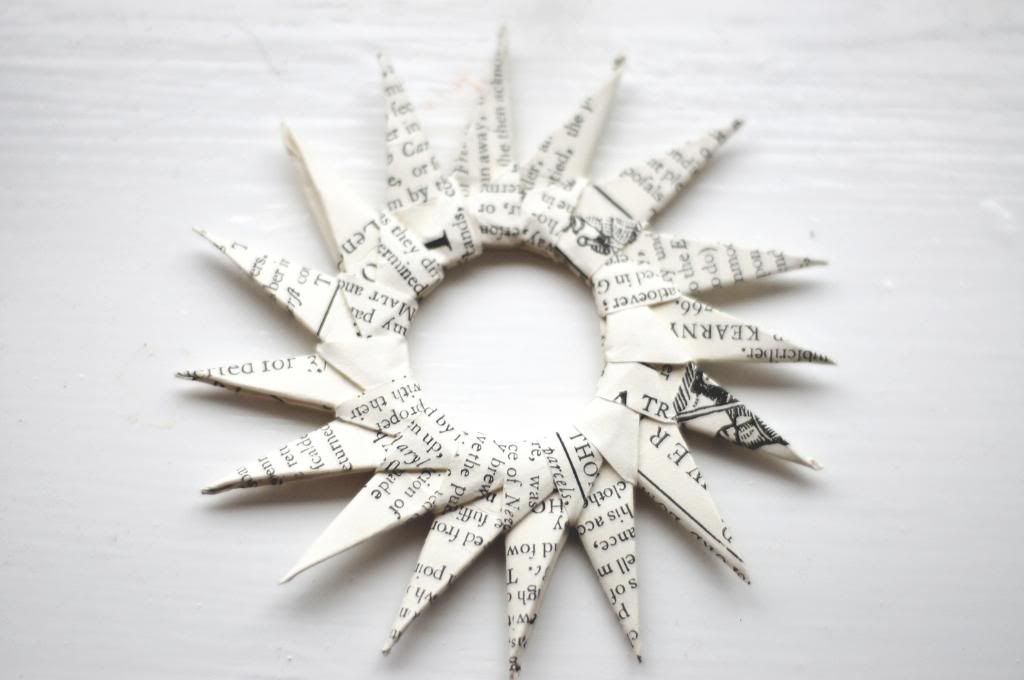
This year I knew I wanted to go with the star theme and love a bit of origami. I finally found this pattern on a number of sites. I sort of combined a lot of tutorials because several were in different languages. I also made the starbursts a lot smaller out of thicker paper. So here is my own take on the paper starburst.


Tutorials I referred to here and here

Supplies: 

Thick paper. Not card as it could be hard to fold but not thin paper either.
Embellishments to decorate
Patience
A cup of tea (goes without saying)

Instructions:
1. For each starburst you will need 16 2' x 2' squares. It's just easier to cut these out first.


2. Take your first square and fold the corners into the centre like this.


3. Now turn the square so it is like a diamond and fold two of the edges in like this so it looks like a kite.

4. Turn the kite shape over and fold that top triangle over.


5. Now fold the shape in half so that folded edges are on the inside and that triangle you just made is on the outside.


6. You have completed the first point of the starburst! Make another just the same. To join them take one of your points and look at the folded edge. You should see two little openings. You need to push the pointed ends of the second point into these openings like this.


7. Because you have used thick paper the points should slot in tightly and hold their shape. I didn't use glue at all but if you want them more robust I would add a dab of glue to secure each point into the next one.

8. Keep making the points of the star and slotting them into the next one. I slotted eight together like this, left it, and then created another eight and joined the two halves together.


9. Joining together is the hardest part as it can be a bit wobbly but once all sixteen are in place it will hold together pretty well.


10. I decorated each starburst with the initial of the guest and some stars.


A few tips:

If you are having difficulty slotting the points into the flaps, open the flaps a bit more with a bit of wire.
Once you get the hang of it these are so easy. I suggest a large mug of tea, an audiobook and some slippers.


Enjoy!

15 September 2012

Tutorial- Watercolour Map

Hi

So, the last of my student makes. I have had so much fun putting this mini series together. Thank you to everyone who commented and pinned and read.
This last make is super easy and very effective- my brother commented on it! Now that is a compliment friends!


Supplies: 
2 sheets of white card
Watercolours
Glue (any will do)
craft knife

Approx cost:
I think I had everything on hand. Definitely not going to cost you a lot!
£10 for the frame but this is purely optional!

*The first few pictures are awful. I am sorry! The paint was a stronger colour in real life!*

1. Grab your first sheet of white card. I used a 12 x 12 piece just so I had more space to work on. Choose two colours that blend together. Eg blue and green or red and pink. You get the idea!

2. You are going to create an ombre effect so starting with the darker colour sweep it across the top of the page. Add more and more water as you move down so it turns lighter and then blend in your next colour using the same technique.


3. Leave your paper to dry. I am so impatient at this stage!

4. Whilst your paper is drying print out the outline of the UK or state or country depending on where you are! Just print it black and white on your second piece of card. A4 sized this time.

5. Using Scissors and a craft knife carefully cut away inside the shape of the country so you are just left with a stencil. This part does take some patience and some time so go slowly, making sure you get the details.


6. When you are happy with your stencil lay it over the top of your watercolour page. This is why I use a bigger piece of card for the watercolours-it gives you more options at this stage. Move your stencil around on the page till you are happy with the positioning of the colours on the map.


7. Glue your stencil securely to the watercolour page and trim the back page to A4.

8. Cut out a small dot or heart and stick it to your favourite place on the map. I then sewed around the edge of the stencil for effect but this is entirely optional.


9. Pop in a frame!

Easy peasy!

Thanks for stopping by