Showing posts with label Tutorials. Show all posts

27 August 2012

Tutorial- reverse applique ampersand

Reverse applique is a technique I found a while back on the design sponge blog. It is very effective and looks much harder than it is!

I had great fun messing about and eventually created a simple ampersand motif. Here's how..

Materials: 

Two pieces of fabric, one plain, one patterned. Both roughly A4 sized. 
Sewing machine
Sharp scissors 

1. Grab your two pieces of fabric and decide which will be the background and which the ampersand. I used the spotty fabric for the background. 


2. Print out your ampersand shape and trace it onto the background fabric. (In my case the spotty fabric). To trace simply tape the paper to a window and place the fabric over it. The light makes it easy to draw the design onto the material. I used a white pen so that it showed up on the dark material.

3. Pin your fabric together with the background material on top. In my case the white is under the spotty. Use lots of pins to be sure that your fabric won't move. 


4. Set up a contrasting thread (I used white) and sew around the ampersand shape. The two pieces of material will now be joined together. 

5. (This is the fun part!) Using your sharp scissors, carefully cut away the TOP layer of the fabric inside the sewn lines. This will leave the coloured fabric underneath exposed. Make sure you don't cut too close to the sewed lines.


6. There are many things you can do with your ampersand now. You could pin it right sides together with another piece of fabric and sew it into a place mat or do what I did, and zig-zag the edges to stop it fraying and then pop it into a frame. 


Cute, simple artwork! Have fun! 

15 August 2012

Tutorial- How to make a blog planner


Hi 

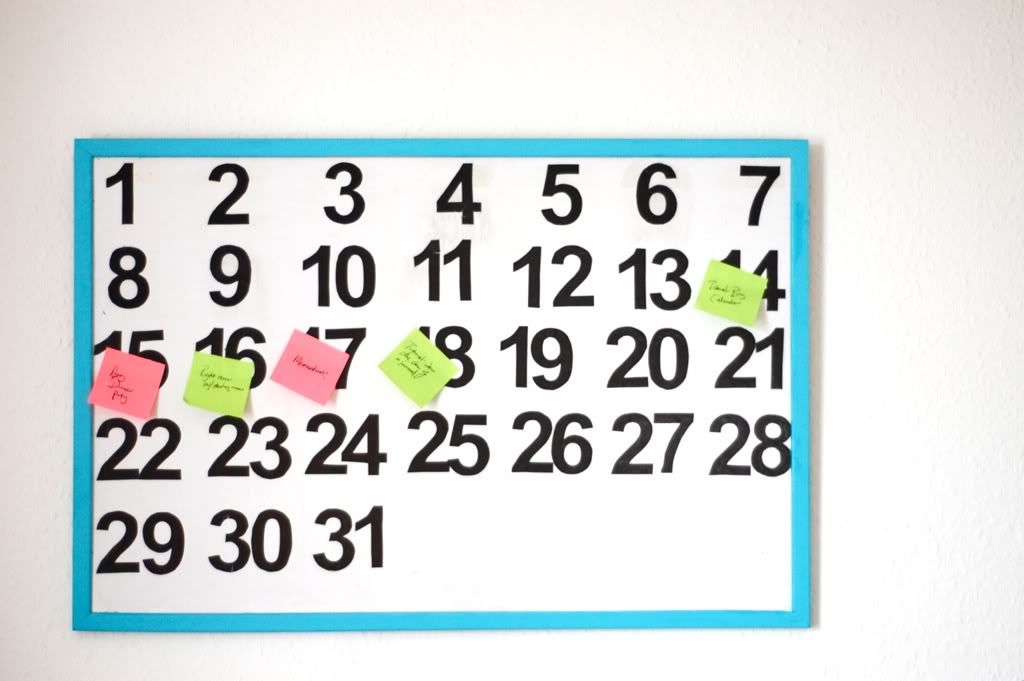
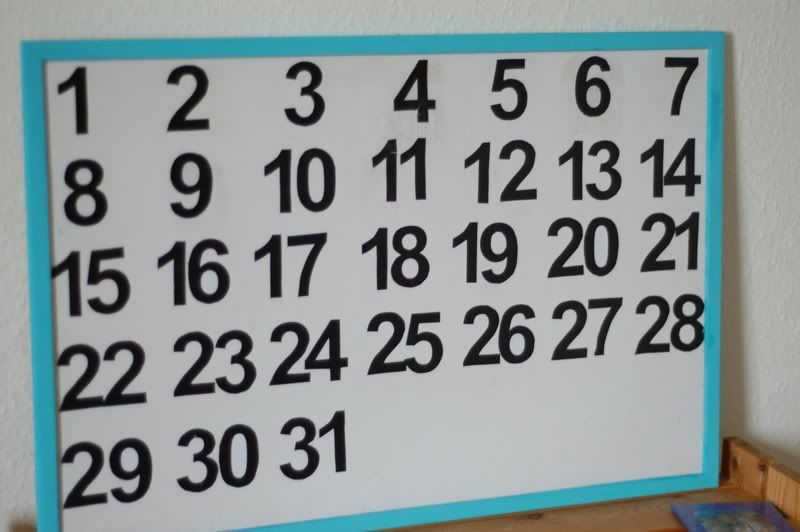
Today I want to share a quick make with you. This was inspired by Elise Blaha. On her blog she showed the wonderful calendar she uses to plan her blog posts. I knew that I couldn’t buy something like that in England so had a brain storm and decided to create my own. 

This is a great tool if, like me, you tend to schedule posts. 

You will need: 


Tacks or nails.

An A3 (ish) sized whiteboard. I got mine from Tesco for £3.50. It doesn’t necessarily have to be a whiteboard, but you need a solid base with a frame. A whiteboard also gives you a prepared clean background. 

A tester pot of paint in matt or any paint that will go onto wood well. 

Printed sheets of numbers to thirty one. I used arial in bold with a font size of 200. 

Watered down PVA glue or modge podge


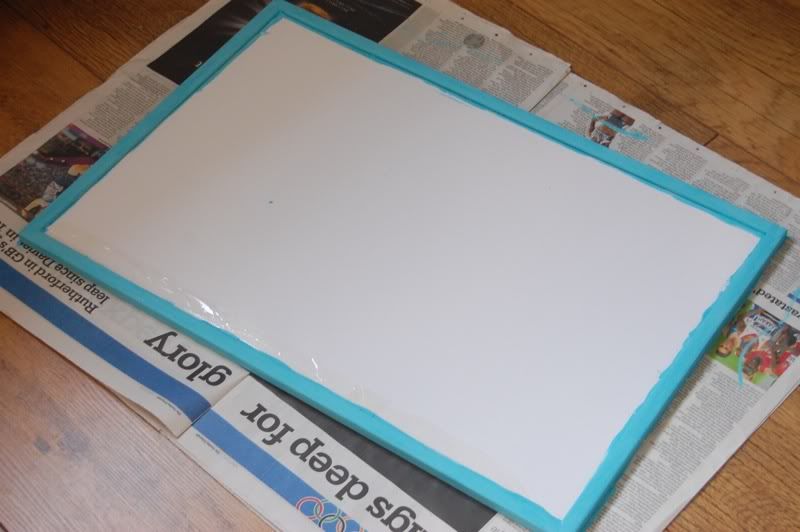
1. Paint the edge of your frame. I chose a zingy blue. I wanted by planner to look very graphic so tried to make my frame a solid colour. I coated it in two layers of paint. Before you paint it is a good idea to tape off the edge of the board. I didn’t bother with this stage as the whiteboard was shiny. Any paint that dried on the board itself could just get scraped off afterwards.


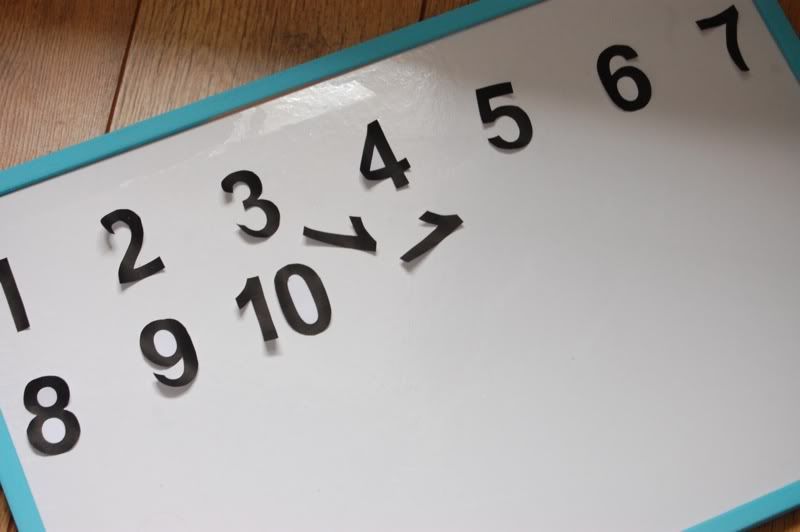
2.I used a computer to print my numbers. You could easily buy them but I found that the cost rocketed up. Instead I chose the longer, but cheaper, option and hand cut them. Don’t bother cutting the inside of the numbers out (like the middle of the eights). If the board is white, they won’t show up. 

3.Arrange your numbers on your board. I decided not to add the days. This meant my planner wasn’t confined to one month. I wasn’t too fussy about how straight the rows and columns were so my numbers are a little squiff but you could easily take more time over this!


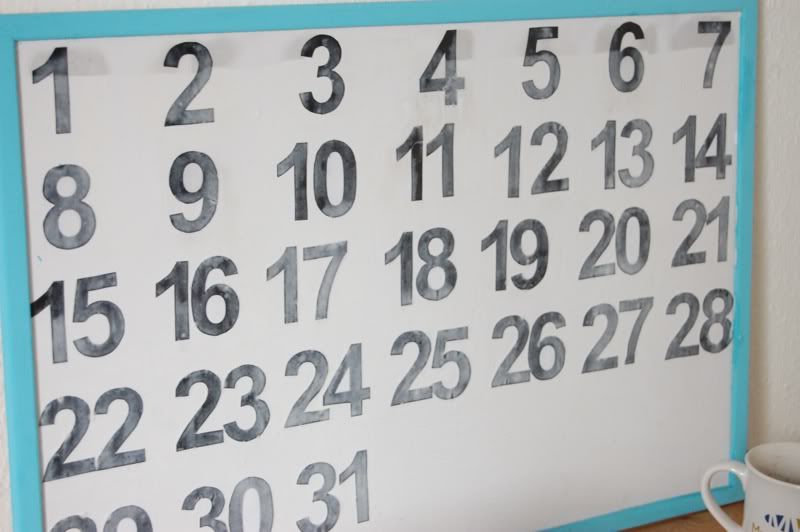
4. Grab your watered down PVA and a paint brush.  Glue each number down and then brush the glue over the top to seal it. The glue goes on white but dries clear. 


5. Leave to dry and then hang. Beautiful! 


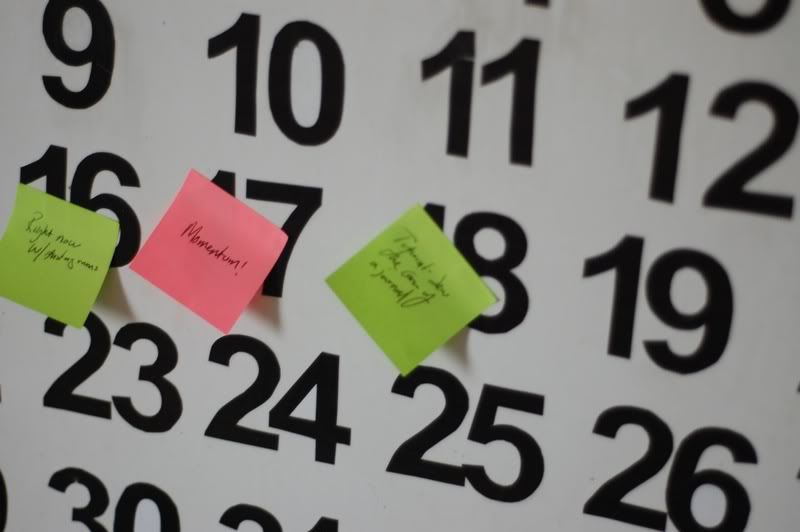
6. I follow Elise’s tips and use post-its to plan my blog posts. I write the title of the post on the note and stick it to the appropriate date it will be published on. Green are blog posts, pink are events. I know. I know!  

This was a very easy and very cheap make. It could be easily adapted for a more proffesional look, using number stickers instead of printed paper. You could also cut out the days of the week and blue tac them to the top and move them depending on the month. 

Thanks for stopping by

21 July 2012

It's just too much- balancing camera quality vs practicality

Hi


The last day of my photography mini course. Thank you so much to everyone who has taken part and left such lovely words of encouragement. I really hope the course has taught you something new and maybe encouraged you to move off the automatic setting?!

This last post is about a dilemma that many of us face when going away...

What camera do I take with me? 
Do I look for quality or practicality? 

I think there are essentially two options; your big camera and your mobile, both of which have pros and cons.

To help make that decision easier I have put together a quick flow chart. This is certainly not definitive but helps me work through my options.

Just to clarify an answer of "yes" is the green arrow and an answer of "no" is the red arrow.


Again, thank you so much for joining me on this little course. Have you enjoyed it? I would really appreciate some feedback. 

Thanks for stopping by 


19 July 2012

freeze and blur- How to have fun with shutter speed

Hi

Today's post has changed a bit as I decided that there was more that could be said on Shutter speed!

If you haven't stopped by recently, this post is part of my photography mini course which has taken place over the last two weeks. You can find more about it here.


When this course started up, one of the first things I talked about was shutter speed and how it plays a crucial part in the exposure of each picture.

As a quick re-cap, shutter speed is esentially how fast or slow your shutter is closing, therefore effecting how much light enters the camera.

Shutter speed can be used for something else though..

Imagine the shutter speed has been set to a really low number. As in it is taking a second or longer for the shutter to close. Any movement by the subject in that time will naturally be recorded.

We call this motion blur. Motion blur gives pictures like this...


It is very easy to set up as most cameras have a Shutter speed priority setting (S). Set your shutter speed to around about a second. It helps to have your camera on a tripod or a table.

Ask your subject to run towards you, move their head, wave their hands or run and jump. Click the shutter and voila! You should get some fun blurred shots.

Motion blur has many possibilities. Try getting one person to stand stock still near to a busy road. The cars will all become blurred where as the subject will be in pretty sharp focus. This effect also works when trying to write words with sparklers.


The other end of the spectrum is freeze frame. This is, as you might have guessed is when you set your shutter speed very high. The shutter is closing after a point of a second.

Freeze frame does what it says on the tin. It is great to play around with running water, A fast shutter speed will freeze the water droplets and give this sort of effect...


Knowing about shutter speed and motion blur and freeze frame is useful. Although you won't use them every day, they do give very cool and funky effects!


Thanks for stopping by

17 July 2012

It's all in the details- photographing the little things

Hi

Another day, another photography post.

Everything I have covered so far in this mini course has been about the "big picture". The people, the places, the important moments.

Something that is often forgotten is the details. I think it is so important to capture those everyday things because they are the things that often change. In a few years it will be fun to look back on those small things, those things that made up our daily lives.


I find that the best way to capture the little details is to use my mobile. More often than not I am on the move and very rarely have my big camera with me. The dawn of instagram has also made mobile photography more of a possibility.

If you are new to capturing the details, here are a few of my favourites to look out for and snap.

1. Food. At a special meal or family get together it is fun to photograph what you are eating. It is a great   technique to use on a layout as well; the photos of the main occasion and the people and then photographs of the dishes you chose. I also love to capture my cups of tea and coffee when I am on the move! And, let's be honest, food can look pretty cool, I mean look at those amazing teapots!


2. My workspace. I think it is important to document where you spend a lot of your time. In years to come this is a fun thing to look back on.


3. Craft projects. This may sound obvious but how often do we photograph the process of crafting? I often take a photo of the finished project, all set up with nice lighting etc, but hardly ever get shots of the nitty gritty stages. Not only can the photos of the process be fun to look at, for me it is also a great way to remember how I made something.


4. Feet photos. This is one of my favourite types of photo to capture. Not only do I capture my shoes ( I mean, what's not to love about photos of shoes!) but I also document the place and who I am with. This photo for instance is very precious to me and I wrote about it here. 

Capturing feet also respects peoples privacy. When I was working this year, I couldn't take photographs of the children and post them here, even though they became quite important to me. I didn't feel it was too bad though to capture their feet! Often the feet tell more of a story!


What details do you like to capture?

Thanks for stopping by

Abi

15 July 2012

The face has it- candid photography

Hi 


Another post and into the second week of my mini photography course. 
The schedule and links to previous posts can be found here


Today is all about the candid shot. This is how google defines candid..


"A photograph of a person taken informally, esp. without the subject's knowledge."


That is candid in a nutshell and it is probably my favourite type of photo to shoot. You know why? Because it is easy. 


Candid photography does take a bit of getting used to. You are basically shooting a person without them realising you are doing it. The result? Beautiful, informal and very natural photographs. 


Here are my top tips for getting those natural, un-posed, photographs.


1. Have your camera with you. It sounds straightforward but to get a good candid shot you need to have your camera constantly there. Candid can't be set up so you need to be able to quickly press the shutter and capture the shot. 


2. For a few minutes at a time, keep your camera up to your eye. Scan the room/garden through your viewfinder. Yep, some people will notice and try to pose but most won't and you can get that lovely natural shot with just one click.


3. Take a lot of photos. It sounds silly but the more photos you take, the less people seem to notice the camera. If you take just a few, the camera coming out becomes a big event. Your subject is more likely to be self conscious and aware and then pose. If you are taking pictures here there and everywhere, your subject will soon get bored and go back to what they were doing before. Result!


The above is one of my all time favourite photos of the boy. It came about after a day of taking literally hundreds of photos. I was sitting on the sand and  typically was clicking away. He was stood next to me and I happened to look up at him, He was so used to the camera he didn't notice when I clicked the shutter and got this gorgeous natural shot of him. Perseverance my friends!


4. Zoom in. That way you can stand a long way away from your subject and they tend not to notice you are taking a picture. This works brilliantly with children. If a child notices you are there, they will snap out of that little imaginary world they are in. Zoom in from a distance and you will capture them at play. 


5. Don't worry about photographing the back of peoples heads. The way they are standing can be interesting. A face doesn't have to tell the main story. If in doubt wait, if your subject is relaxed and 
doesn't really realise you are there, they will move their body anyway.


Candid photography is so much fun. I do realise though that these tips do make me sound a bit like a stalker! I promise I really only take candid shots of close friends and family, who put up with my weird camera ways. I suggest you do likewise or you could be getting some strange looks!


If you try candid photography, do link up in the comments. We would love to see your results!


Thanks for stopping by 


13 July 2012

Outtakes- What goes on behind the scenes

Hi friends

Welcome back to my photography mini series.
If you are new to this mini course the schedule with links to the previous posts can be found here


Today I want to chat about what happens behind the scenes, the things that go on behind the camera, the photos that aren't often posted.

I will say it now and I will say it again but there will never be a batch of photos that you are 100% happy with. There are however, things you can do to ensure that you have every possible chance of success...


Lesson 1:
Take LOTS of photos. It costs you approx. half a second more to take a second photo, but that photo may be the difference between a duff one and the perfect shot. Take this set for example. Near identical photos but only one is good enough to use. That comes from clicking the shutter just a few times more.


It is a standing joke in my family that I take literally hundreds of photos. You know what though, I would prefer to have a back log of pictures I haven't used and have the choice than find I have missed that special moment.


Lesson 2:
If you are shooting people, have your camera focused and ready when the subject isn't looking. Call their name and click, A beautiful, natural shot. With children call their name and do something silly, you will automatically get a good laugh!


Lesson 3:
In a dark room or in the evenings, use a tripod. That way your shutter speed can be nice and low and you won't blur your pictures. I use a gorilla-pod which can be bent around different objects. If you don't have a tripod rest your camera on a solid object like a bookshelf.

If you really don't have anything to rest your camera on, take a breath in, press the shutter and breathe out. Honestly it works!


Lesson 4:
Set up your camera before you shoot. If you know you are going to be taking lots of photos at say a party or event, get there early and take a trial shot. You can work out your shutter speed etc when no one is around then when you are in the thick of it you don't have to drastically alter your settings.


Lesson 5:
When taking photos of craft projects, find a space with natural light, a window is spot on! Try not to use flash, it bounces off photos on a layout and looks horrible. Get has high above your project as you can ( I use a chair). Point your camera directly down over your work like this. (It may take a bit of trial and error).


After you have taken the photo crop out the edges. I also lay my projects on a white piece of card first.


Lesson 6:

Try and get as good a picture as you can on camera. There is only so much editing afterwards that you can do. If you need to edit, do it subtly. A tweak of highlights and shadows is normally all that is needed.

I do most of my editing here

Again, this is just a peep into my world. The things I do behind the scenes to make sure I have the best possible chance of getting a good photo.

Thanks for stopping by. The next post in the series will come on Sunday and is about those beautiful candid photos.

Abi