

This year I knew I wanted to go with the star theme and love a bit of origami. I finally found this pattern on a number of sites. I sort of combined a lot of tutorials because several were in different languages. I also made the starbursts a lot smaller out of thicker paper. So here is my own take on the paper starburst.

Tutorials I referred to here and here
Supplies:
Thick paper. Not card as it could be hard to fold but not thin paper either.
Embellishments to decorate
Patience
A cup of tea (goes without saying)
Instructions:
1. For each starburst you will need 16 2' x 2' squares. It's just easier to cut these out first.

2. Take your first square and fold the corners into the centre like this.

3. Now turn the square so it is like a diamond and fold two of the edges in like this so it looks like a kite.


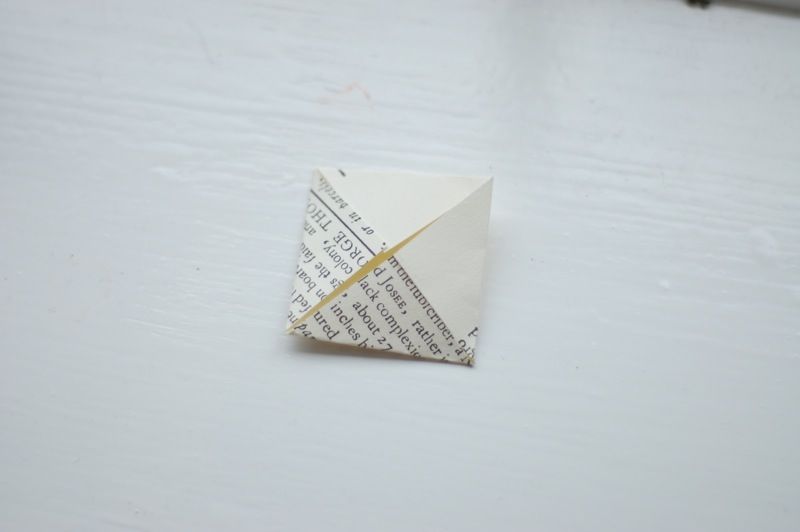
4. Turn the kite shape over and fold that top triangle over.


5. Now fold the shape in half so that folded edges are on the inside and that triangle you just made is on the outside.

6. You have completed the first point of the starburst! Make another just the same. To join them take one of your points and look at the folded edge. You should see two little openings. You need to push the pointed ends of the second point into these openings like this.


7. Because you have used thick paper the points should slot in tightly and hold their shape. I didn't use glue at all but if you want them more robust I would add a dab of glue to secure each point into the next one.

8. Keep making the points of the star and slotting them into the next one. I slotted eight together like this, left it, and then created another eight and joined the two halves together.

9. Joining together is the hardest part as it can be a bit wobbly but once all sixteen are in place it will hold together pretty well.
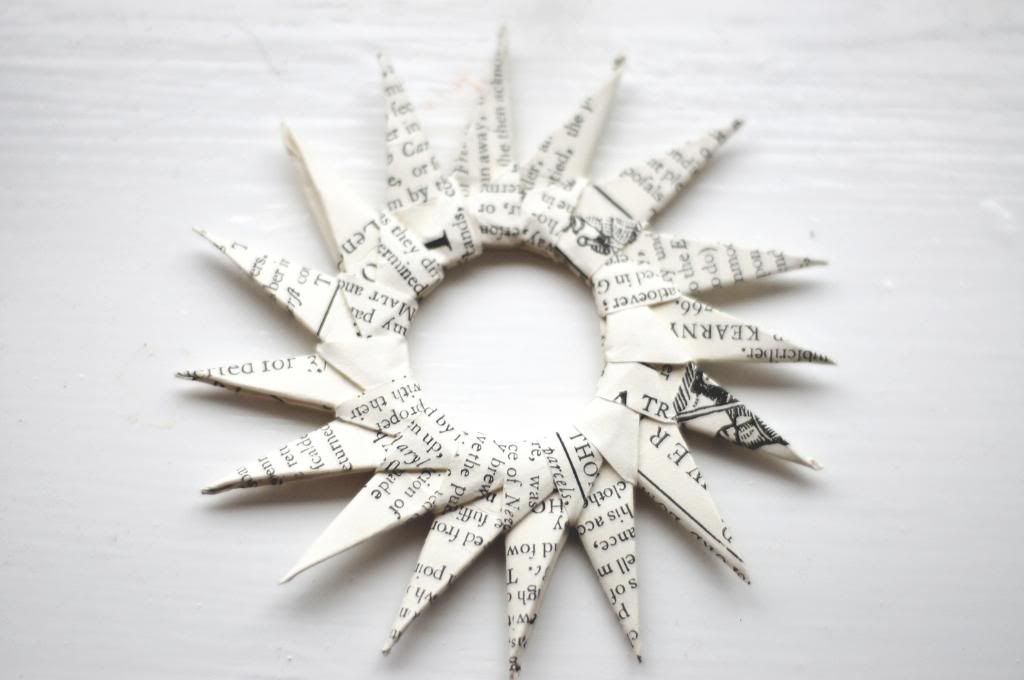
10. I decorated each starburst with the initial of the guest and some stars.

A few tips:
If you are having difficulty slotting the points into the flaps, open the flaps a bit more with a bit of wire.
Once you get the hang of it these are so easy. I suggest a large mug of tea, an audiobook and some slippers.

Enjoy!


6 comments:
And they look wonderful,Abi.
what a lovely tradition and these look fabulous
wow abi these are gorgeous! great tutorial too x will pin for future reference :) x
I am going to have a go at these as a decoration on a larger present. I hope I don't end up substituting gin for tea and a whole box of chocolates!
Beautiful! But they made me laugh because they would take me about a million hours to make! Hope you're enjoying your time with your family.
Rinda
Very pretty. I am copying this idea for my Christmas Day and New Years Eve tables. Thank you for the tutorial.
Post a Comment