24 December 2013
Joyful, expectant waiting
Today we are waiting. Waiting for midnight, waiting for the bells to peal through the candlelit church and for Christmas to arrive. We are again expectant for a birth...
"Today in the town of David a Savior has been born to you; he is the Messiah, the Lord"
Luke 2:11
Merry Christmas friends.
21 December 2013
DIY christmas table decorations
Each year I try and make something to decorate our table with on Christmas day. I like to create something that not only makes the table look prettier but also serves as as a name card.
This year I went super simple and made these little sacks, each filled with a selection of chocolates and tied up with a little salt dough tag with the recipients initials.
This DIY is very easy and very cheap. The bags are versatile enough to be used at any time of year- I just made them christmassy with some red ribbon!
Supplies:
Salt dough
Alphabet stamps
Hessian material
Sewing Machine
Ribbon and twine.
To make the tags:
1. I followed a really simple recipe for salt dough, simply 1 cup flour to 1/2 a cup of salt and 1/2 a cup of water. Mix and knead this until you have a smooth pliable dough. Roll the dough to about a quarter of an inch thick and then cut out circles with a biscuit cutter. Using a straw, punch a hole in the top of each circle.
Salt dough takes a while to harden. I just put them in the bottom of our AGA all day. Basically place them somewhere on a really low heat to dry out. Don't cook them!
2. Once your salt dough tags are rock hard it is your chance to decorate. Salt dough takes any kind of paint so you can go crazy! I simply brushed on some white accrylic paint with a bit of tissue. I then stamped the initial of each of the recipients onto the tag when the paint was dry.
To make the sacks:
1. Each sack uses a piece of hessian about 8" x 4". My sacks were very roughly cut though as I figured that I was going for a rustic look (its a great excuse for wonky sewing!).
2. Hessian frays really easily so to try and prevent this I quickly sewed a zig zag stitch around all the edges.
3. To make the top of your sack nice and neat, take one of the shorter sides of material and fold it over about 1/4 of an inch. Using a straight stitch hem down this side. Repeat on the other end of material.
4. Fold the material right sides (the neat looking sides) together so that the hemmed edges meet. Using a straight stitch again sew each side of the sack. There is no need to sew the bottom as it is folded.
5. At this stage you can leave the sack as it is but I think it looks nicer if you "box" the bottom. Doing this will make the sack stand up on its own.
6. Holding the sack with the open end at the top, push down until one of the bottom corners folds into a triangle.
7. Pin across like this. Repeat on the other corner.
8. Sew a line just below this pin like so.
9. Your sack should now look like a little animal with funny ears!
10. Turn the sack inside out and voila! You have a sack with a lovely square bottom ready to be filled. These little bags hold about four 'quality street' sized chocolates.
10. To decorate thread your salt dough tag onto some twine and wrap it around the neck of the sack.
11. Add your ribbon and tie a bow to finish.
I think these bags would look sweet at any occasion. You could even make one for each day of advent, you could fill them with treats for valentines day or just leave it for someone to find. They don't even need a tag!
Do you make anything to decorate the table with on Christmas day?
This year I went super simple and made these little sacks, each filled with a selection of chocolates and tied up with a little salt dough tag with the recipients initials.
This DIY is very easy and very cheap. The bags are versatile enough to be used at any time of year- I just made them christmassy with some red ribbon!
Supplies:
Salt dough
Alphabet stamps
Hessian material
Sewing Machine
Ribbon and twine.
To make the tags:
1. I followed a really simple recipe for salt dough, simply 1 cup flour to 1/2 a cup of salt and 1/2 a cup of water. Mix and knead this until you have a smooth pliable dough. Roll the dough to about a quarter of an inch thick and then cut out circles with a biscuit cutter. Using a straw, punch a hole in the top of each circle.
Salt dough takes a while to harden. I just put them in the bottom of our AGA all day. Basically place them somewhere on a really low heat to dry out. Don't cook them!
2. Once your salt dough tags are rock hard it is your chance to decorate. Salt dough takes any kind of paint so you can go crazy! I simply brushed on some white accrylic paint with a bit of tissue. I then stamped the initial of each of the recipients onto the tag when the paint was dry.
To make the sacks:
1. Each sack uses a piece of hessian about 8" x 4". My sacks were very roughly cut though as I figured that I was going for a rustic look (its a great excuse for wonky sewing!).
2. Hessian frays really easily so to try and prevent this I quickly sewed a zig zag stitch around all the edges.
3. To make the top of your sack nice and neat, take one of the shorter sides of material and fold it over about 1/4 of an inch. Using a straight stitch hem down this side. Repeat on the other end of material.
4. Fold the material right sides (the neat looking sides) together so that the hemmed edges meet. Using a straight stitch again sew each side of the sack. There is no need to sew the bottom as it is folded.
5. At this stage you can leave the sack as it is but I think it looks nicer if you "box" the bottom. Doing this will make the sack stand up on its own.
6. Holding the sack with the open end at the top, push down until one of the bottom corners folds into a triangle.
7. Pin across like this. Repeat on the other corner.
8. Sew a line just below this pin like so.
9. Your sack should now look like a little animal with funny ears!
10. Turn the sack inside out and voila! You have a sack with a lovely square bottom ready to be filled. These little bags hold about four 'quality street' sized chocolates.
10. To decorate thread your salt dough tag onto some twine and wrap it around the neck of the sack.
11. Add your ribbon and tie a bow to finish.
I think these bags would look sweet at any occasion. You could even make one for each day of advent, you could fill them with treats for valentines day or just leave it for someone to find. They don't even need a tag!
Do you make anything to decorate the table with on Christmas day?
19 December 2013
Project Life
Dear Project Life, I have neglected you lately. My creative energy has been sapped into work and I'm sorry. But you know what, I have got home and those ideas they are coming at me in force.
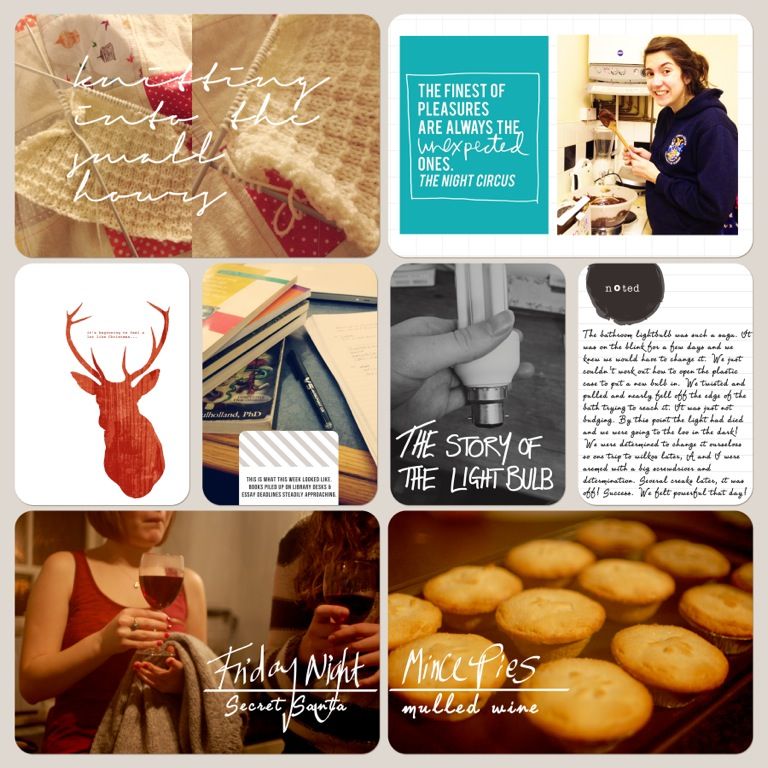
So, because I enjoy posting it here and because I value when others post their project life pages, this is week 49 in all its glory.
Photos:
The penultimate week of term so quite a few photos to document. I had a few silly stories I wanted to include such as our triumph at changing the bulb in the ceiling light of the bathroom.
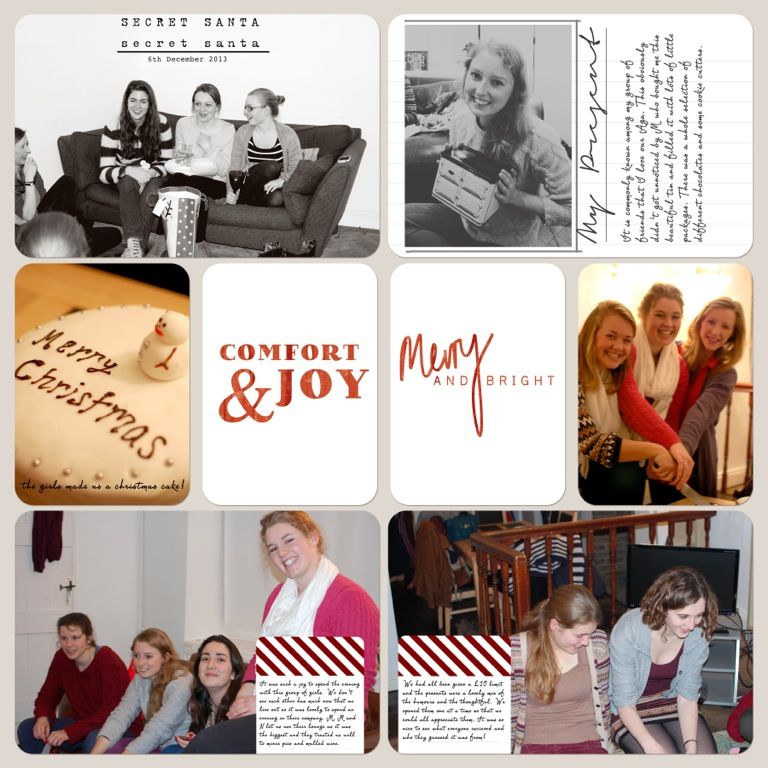
I also had lots of photos from our secret santa evening. The top photo on the right hand spread had a good amount of white space. In photoshop I cloned out the picture that was hanging on the wall behind the sofa so as to make more space to write.
Journalling:
I did my usual techniques for journalling this week- lots of journalling cards stuck directly on photos and titles written on too. I got out the graphics tablet again and really enjoyed adding some of my own handwriting to this weeks spread.
Techniques:
I needed a few fillers this week and have really liked the more clean and graphic side of project life that I have seen appearing. I had a play around and created those three red christmas 3 x 4 cards in that style. If you would like either the "comfort and joy" card or the "merry and bright" card I have them saved on file and would be happy to email them your way!
Anything else:
I started putting the book together this week! Yes, you heard that correctly, the book is in production. I am itching to get it all uploaded and sent off but am hanging in there because I know that blurb do some decent discounts and the size of this book could mean it will be fairly pricey.
There are some weeks I have missed this year, I think two, and I debated about catching up. I then decided that doing so would be counter productive. I have few photos from those weeks and I certainly can't remember the detail of what happened. In the years to come I am not going to miss two weeks. Keeping it real folks!
I am planning and sketching and thinking about next year and my thoughts on this year. Stay tuned for more details on where I want this project to go in 2014!
So, because I enjoy posting it here and because I value when others post their project life pages, this is week 49 in all its glory.
Photos:
The penultimate week of term so quite a few photos to document. I had a few silly stories I wanted to include such as our triumph at changing the bulb in the ceiling light of the bathroom.
I also had lots of photos from our secret santa evening. The top photo on the right hand spread had a good amount of white space. In photoshop I cloned out the picture that was hanging on the wall behind the sofa so as to make more space to write.
Journalling:
I did my usual techniques for journalling this week- lots of journalling cards stuck directly on photos and titles written on too. I got out the graphics tablet again and really enjoyed adding some of my own handwriting to this weeks spread.
Techniques:
I needed a few fillers this week and have really liked the more clean and graphic side of project life that I have seen appearing. I had a play around and created those three red christmas 3 x 4 cards in that style. If you would like either the "comfort and joy" card or the "merry and bright" card I have them saved on file and would be happy to email them your way!
Anything else:
I started putting the book together this week! Yes, you heard that correctly, the book is in production. I am itching to get it all uploaded and sent off but am hanging in there because I know that blurb do some decent discounts and the size of this book could mean it will be fairly pricey.
There are some weeks I have missed this year, I think two, and I debated about catching up. I then decided that doing so would be counter productive. I have few photos from those weeks and I certainly can't remember the detail of what happened. In the years to come I am not going to miss two weeks. Keeping it real folks!
I am planning and sketching and thinking about next year and my thoughts on this year. Stay tuned for more details on where I want this project to go in 2014!
16 December 2013
sitting down to write
I am sitting down to write these words and I don't know how to catch up on a week away.
A week that was so full of joyful, funny and christmassy things.
I want to tell you about our evening of doing secret santa presents or of the carol service which I helped at, that was attended by nearly three thousand students.
I want to fill you in on this term, I want to be honest and tell you that both my body and my heart are weary. There has been more academic expectation this term, more demands on time but also more rewards.
I want to tell you that I am tired after so many late nights but that sometimes laughing into the small hours is far better than that extra hour of sleep. For now at least.
I want to tell you that I am behind on project life, on the friendship quilt and on most crafty things but am feeling very relaxed about this. I know these things will happen and that from experience there is no point in trying to force the creativity.
Most of all I want you to know how eager I am to get blogging regularly again but for now I am resting this little head of mine and enjoying the warmth and comfort of being home for the holidays.
A week that was so full of joyful, funny and christmassy things.
I want to tell you about our evening of doing secret santa presents or of the carol service which I helped at, that was attended by nearly three thousand students.
I want to fill you in on this term, I want to be honest and tell you that both my body and my heart are weary. There has been more academic expectation this term, more demands on time but also more rewards.
I want to tell you that I am tired after so many late nights but that sometimes laughing into the small hours is far better than that extra hour of sleep. For now at least.
I want to tell you that I am behind on project life, on the friendship quilt and on most crafty things but am feeling very relaxed about this. I know these things will happen and that from experience there is no point in trying to force the creativity.
Most of all I want you to know how eager I am to get blogging regularly again but for now I am resting this little head of mine and enjoying the warmth and comfort of being home for the holidays.
7 December 2013
Let's talk matte black and white edits
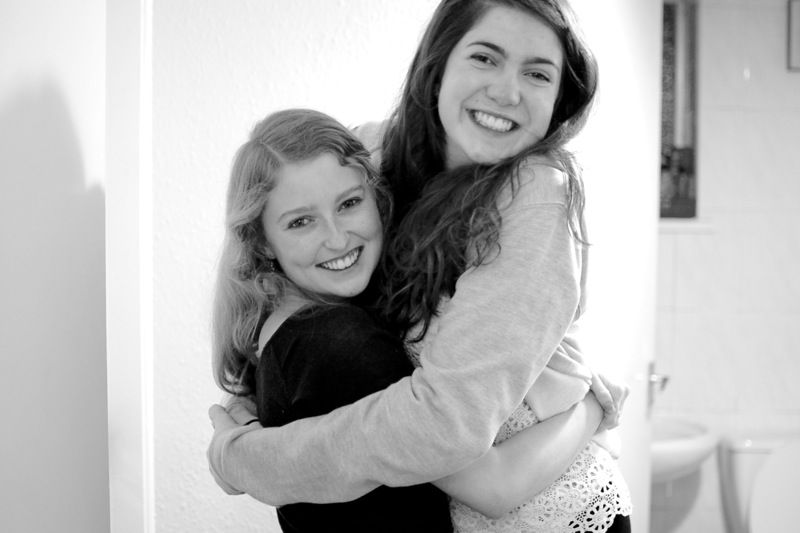
I don't edit that many of my photos but I do play around with black and white filters quite a lot.
One effect i've noticed that is becoming more popular is the matte effect.
Don't get me wrong, I really like black and whites with a lot of strong contrast, but I am enjoying playing with these slightly greyer toned photos.
Unlike ordinary black and white I find that it doesn't work on all photos.
Photos with strong dark and light already don't work so well with this filter.
Photos of people tend to work better too.
I also think it's quite a flattering filter for photos that are imperfect or blurry or have some funky lighting going on.
I use this effect quite a bit in project life because the photos make a nice background to add words to as the tones are far subtler.
I am interested to know what you think? On the whole I think I prefer the stronger contrast black and white photos but I do like the greyer tones with this filter.
Have you seen this effect being used?
Do you use it or do you prefer not to edit?
I used an action in photoshop to achieve this effect. You can find it for free here
4 December 2013
5 things at midnight-student edition
The lovely Sian, of storytelling fame, has recently posted ideas for a five things post. The title of this is entirely taken from her!
So here are my five things that happen at midnight. ( The original title was five things to think about at midnight but as you will soon see, less thinking and more doing happens at that hour in our little house!)
Midnight. It's that funny hour that seems shorter than all the rest. Somehow midnight runs into one 'o' clock with indecent speed so that before you know it, a reasonable time to turn the light out has become a speedy hour, of blog reading, commenting and posting and then, here we are in the wee small hours.
Midnight. The hour of every opportunity. I leave all my jobs till midnight. I justify this with saying that I do work in the day and everything else in the evening. Folding laundry, washing the mugs, reading blogs, working on Project Life. I am productive at midnight I tell you!
Midnight. The hour of long chats. Midnight means the third cup of tea and the phrase "I should probably head to bed now but oh well..." Midnight means sitting in the lounge, under the quilt with a hot water bottle not wanting to move after a good film.
Midnight. The time for "landing" conversations. The "I've just gone to brush my teeth but i'm still standing outside the bathroom talking" time. For some reason, at midnight, the best conversations happen on the stairs while one person brushes their teeth.
Midnight. 12.04. The hour I am writing this. What we think of in our dear little house as an early night.
2 December 2013
Storytelling Sunday-in the candlelight
Go back ten years or so and I am eleven.
It is dark outside and we are in the week leading up to Christmas day.
The house is full of Christmas, lights twinkling at the windows, holly bough on the door and three advent calendars lined up in the kitchen.
The smells of christmas come from the kitchen. Mince pies on the side and the cupboards groaning with cheeses, crisps, nuts and ingredients to make chocolate puddings.
We are bubbling with excitement for christmas, for the traditions, for Santa Claus. The boxes of oranges are by the back door, in preparation to make Christingle candles.
It is a Saturday evening and we have had a cosy day of reading our favourite christmas stories and decorating the tree. The lounge smells of pine needles already and we are giggling as we tell each other where were have hidden the chocolates on the tree.
After dinner we crowd into the lounge and embark on a funny tradition we do most weekends through advent.
We one at a time choose one of the candles around the room.
They are a fun collection. Some are in lanterns, some have patterns that show through when lit, some are huge and fat, some are tall and thin.
They are scattered about the room during advent, resting on the hearth by the fire or on the windowsill.
We all pick our candles, all five of us. We have our favourites. The box of matches is taken out and one at a time we light them.
My Dad walks over to the lamps and goes around turning them off one by one.
The room is now dark except for the twinkling of the lights on the Christmas tree and the five candles flickering on the table.
We sit there quietly, staring at the flames, remarking how lovely it looks-the lounge lit by candlelight.
After a time in the stillness my Mum starts up the candle song, "see the candlelight, see it burning bright, we don't need it while we're sleeping, blow it out at night".
Puff.
The smoke rises in tendrils to the ceiling and we are left with the fairy tree lights and the almost tangible magic of family at Christmas.
Today I am joining in with the lovely Sian and her storytelling Sunday.
Sian, thank you for making storytelling a joy these last few years. Thank you for the connections you have weaved across the web as we have shared the threads of our lives with each other in the most organic and natural of ways. I feel blessed to have been a part of this meme for so long.