30 July 2012

Blogger storage space

Hi

This wasn't a post I was planning to write but need some opinions and ideas. I have been sitting here trying to add pictures to a blog post when this message came up on blogger..

"Whoops! You're out of space. You are currently using 100% of your 1 GB quota for photos."

Well after much confusion and much shouting at the computer I realised that any photos I had been putting on my blog were being added to my picasa web album. Picasa web albums give you 1GB of storage space. I like my photos and had used up all that space. Deleting photos from the albums isn't an option as then they will disappear from the blog.


You can pay for more storage space but I wasn't prepared to fork out around £16 a year. I chose blogger because it is free. I am also a student with not a lot of money.

I need some help and solutions. I am currently trying photo bucket to host my photos and that seems to be easy enough to work with when putting photos in posts. Has the photo above turned up ok for you when you view it?

Has anyone else had this message?
How do you add photos to your posts?

In general help would be greatly appreciated!

Thank you

Around here- July edition


Another busy month: Getting my new toy. This was definitely one of the most exciting parcels I have ever received. Coupled with the fact that it was my hard earned money that had paid for it! Choosing, cutting and piecing a new quilt. Watching the middle brother finish his schooling. Getting these two goofy boys to cooperate for my photography course. Finishing working and finishing my gap year. Spending a bit of time with this handsome man again. Phew! August is set to be just as exciting! 

What has July brought you? 

22 July 2012

A blog break


We are off on holiday. Escaping the wet British summer to the warmth of America. So for now the blog will be taking a well deserved weeks break! 

See you soon!

21 July 2012

It's just too much- balancing camera quality vs practicality

Hi


The last day of my photography mini course. Thank you so much to everyone who has taken part and left such lovely words of encouragement. I really hope the course has taught you something new and maybe encouraged you to move off the automatic setting?!

This last post is about a dilemma that many of us face when going away...

What camera do I take with me? 
Do I look for quality or practicality? 

I think there are essentially two options; your big camera and your mobile, both of which have pros and cons.

To help make that decision easier I have put together a quick flow chart. This is certainly not definitive but helps me work through my options.

Just to clarify an answer of "yes" is the green arrow and an answer of "no" is the red arrow.


Again, thank you so much for joining me on this little course. Have you enjoyed it? I would really appreciate some feedback. 

Thanks for stopping by 


19 July 2012

freeze and blur- How to have fun with shutter speed

Hi

Today's post has changed a bit as I decided that there was more that could be said on Shutter speed!

If you haven't stopped by recently, this post is part of my photography mini course which has taken place over the last two weeks. You can find more about it here.


When this course started up, one of the first things I talked about was shutter speed and how it plays a crucial part in the exposure of each picture.

As a quick re-cap, shutter speed is esentially how fast or slow your shutter is closing, therefore effecting how much light enters the camera.

Shutter speed can be used for something else though..

Imagine the shutter speed has been set to a really low number. As in it is taking a second or longer for the shutter to close. Any movement by the subject in that time will naturally be recorded.

We call this motion blur. Motion blur gives pictures like this...


It is very easy to set up as most cameras have a Shutter speed priority setting (S). Set your shutter speed to around about a second. It helps to have your camera on a tripod or a table.

Ask your subject to run towards you, move their head, wave their hands or run and jump. Click the shutter and voila! You should get some fun blurred shots.

Motion blur has many possibilities. Try getting one person to stand stock still near to a busy road. The cars will all become blurred where as the subject will be in pretty sharp focus. This effect also works when trying to write words with sparklers.


The other end of the spectrum is freeze frame. This is, as you might have guessed is when you set your shutter speed very high. The shutter is closing after a point of a second.

Freeze frame does what it says on the tin. It is great to play around with running water, A fast shutter speed will freeze the water droplets and give this sort of effect...


Knowing about shutter speed and motion blur and freeze frame is useful. Although you won't use them every day, they do give very cool and funky effects!


Thanks for stopping by

17 July 2012

It's all in the details- photographing the little things

Hi

Another day, another photography post.

Everything I have covered so far in this mini course has been about the "big picture". The people, the places, the important moments.

Something that is often forgotten is the details. I think it is so important to capture those everyday things because they are the things that often change. In a few years it will be fun to look back on those small things, those things that made up our daily lives.


I find that the best way to capture the little details is to use my mobile. More often than not I am on the move and very rarely have my big camera with me. The dawn of instagram has also made mobile photography more of a possibility.

If you are new to capturing the details, here are a few of my favourites to look out for and snap.

1. Food. At a special meal or family get together it is fun to photograph what you are eating. It is a great   technique to use on a layout as well; the photos of the main occasion and the people and then photographs of the dishes you chose. I also love to capture my cups of tea and coffee when I am on the move! And, let's be honest, food can look pretty cool, I mean look at those amazing teapots!


2. My workspace. I think it is important to document where you spend a lot of your time. In years to come this is a fun thing to look back on.


3. Craft projects. This may sound obvious but how often do we photograph the process of crafting? I often take a photo of the finished project, all set up with nice lighting etc, but hardly ever get shots of the nitty gritty stages. Not only can the photos of the process be fun to look at, for me it is also a great way to remember how I made something.


4. Feet photos. This is one of my favourite types of photo to capture. Not only do I capture my shoes ( I mean, what's not to love about photos of shoes!) but I also document the place and who I am with. This photo for instance is very precious to me and I wrote about it here. 

Capturing feet also respects peoples privacy. When I was working this year, I couldn't take photographs of the children and post them here, even though they became quite important to me. I didn't feel it was too bad though to capture their feet! Often the feet tell more of a story!


What details do you like to capture?

Thanks for stopping by

Abi

15 July 2012

The face has it- candid photography

Hi 


Another post and into the second week of my mini photography course. 
The schedule and links to previous posts can be found here


Today is all about the candid shot. This is how google defines candid..


"A photograph of a person taken informally, esp. without the subject's knowledge."


That is candid in a nutshell and it is probably my favourite type of photo to shoot. You know why? Because it is easy. 


Candid photography does take a bit of getting used to. You are basically shooting a person without them realising you are doing it. The result? Beautiful, informal and very natural photographs. 


Here are my top tips for getting those natural, un-posed, photographs.


1. Have your camera with you. It sounds straightforward but to get a good candid shot you need to have your camera constantly there. Candid can't be set up so you need to be able to quickly press the shutter and capture the shot. 


2. For a few minutes at a time, keep your camera up to your eye. Scan the room/garden through your viewfinder. Yep, some people will notice and try to pose but most won't and you can get that lovely natural shot with just one click.


3. Take a lot of photos. It sounds silly but the more photos you take, the less people seem to notice the camera. If you take just a few, the camera coming out becomes a big event. Your subject is more likely to be self conscious and aware and then pose. If you are taking pictures here there and everywhere, your subject will soon get bored and go back to what they were doing before. Result!


The above is one of my all time favourite photos of the boy. It came about after a day of taking literally hundreds of photos. I was sitting on the sand and  typically was clicking away. He was stood next to me and I happened to look up at him, He was so used to the camera he didn't notice when I clicked the shutter and got this gorgeous natural shot of him. Perseverance my friends!


4. Zoom in. That way you can stand a long way away from your subject and they tend not to notice you are taking a picture. This works brilliantly with children. If a child notices you are there, they will snap out of that little imaginary world they are in. Zoom in from a distance and you will capture them at play. 


5. Don't worry about photographing the back of peoples heads. The way they are standing can be interesting. A face doesn't have to tell the main story. If in doubt wait, if your subject is relaxed and 
doesn't really realise you are there, they will move their body anyway.


Candid photography is so much fun. I do realise though that these tips do make me sound a bit like a stalker! I promise I really only take candid shots of close friends and family, who put up with my weird camera ways. I suggest you do likewise or you could be getting some strange looks!


If you try candid photography, do link up in the comments. We would love to see your results!


Thanks for stopping by 


14 July 2012

A few little graphics

Hi

Just a drop by to share some new graphics I have created. Feel free to print them out or pin them up or just look!

I'd love some opinions on them.

Thanks for stopping by

Abi


13 July 2012

Outtakes- What goes on behind the scenes

Hi friends

Welcome back to my photography mini series.
If you are new to this mini course the schedule with links to the previous posts can be found here


Today I want to chat about what happens behind the scenes, the things that go on behind the camera, the photos that aren't often posted.

I will say it now and I will say it again but there will never be a batch of photos that you are 100% happy with. There are however, things you can do to ensure that you have every possible chance of success...


Lesson 1:
Take LOTS of photos. It costs you approx. half a second more to take a second photo, but that photo may be the difference between a duff one and the perfect shot. Take this set for example. Near identical photos but only one is good enough to use. That comes from clicking the shutter just a few times more.


It is a standing joke in my family that I take literally hundreds of photos. You know what though, I would prefer to have a back log of pictures I haven't used and have the choice than find I have missed that special moment.


Lesson 2:
If you are shooting people, have your camera focused and ready when the subject isn't looking. Call their name and click, A beautiful, natural shot. With children call their name and do something silly, you will automatically get a good laugh!


Lesson 3:
In a dark room or in the evenings, use a tripod. That way your shutter speed can be nice and low and you won't blur your pictures. I use a gorilla-pod which can be bent around different objects. If you don't have a tripod rest your camera on a solid object like a bookshelf.

If you really don't have anything to rest your camera on, take a breath in, press the shutter and breathe out. Honestly it works!


Lesson 4:
Set up your camera before you shoot. If you know you are going to be taking lots of photos at say a party or event, get there early and take a trial shot. You can work out your shutter speed etc when no one is around then when you are in the thick of it you don't have to drastically alter your settings.


Lesson 5:
When taking photos of craft projects, find a space with natural light, a window is spot on! Try not to use flash, it bounces off photos on a layout and looks horrible. Get has high above your project as you can ( I use a chair). Point your camera directly down over your work like this. (It may take a bit of trial and error).


After you have taken the photo crop out the edges. I also lay my projects on a white piece of card first.


Lesson 6:

Try and get as good a picture as you can on camera. There is only so much editing afterwards that you can do. If you need to edit, do it subtly. A tweak of highlights and shadows is normally all that is needed.

I do most of my editing here

Again, this is just a peep into my world. The things I do behind the scenes to make sure I have the best possible chance of getting a good photo.

Thanks for stopping by. The next post in the series will come on Sunday and is about those beautiful candid photos.

Abi

11 July 2012

F- stop Magic- Learning about depth of field

Hi

You have joined me again for another day on my mini photography course...

On Monday I touched on how aperture can be used to adjust and correct exposure.
Aperture is not only good for one thing though!
Aperture controls depth of field; esentially how far your camera is seeing.

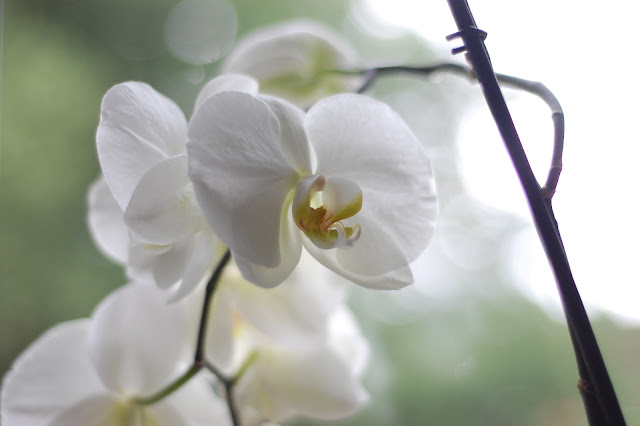
On a low f stop ( a small number) the lens is opened very far but the camera isn't seeing far into the distance. This gives though beautiful blurry backgrounds.
This effect is known as shallow depth of field.


In my opinion, particularly with portrait and still life photography, using a shallow depth of field gives your photos that professional feel. The subject is brought into focus with none of this distracting background.

I think having a beautiful depth of field is what sets SLR's apart from compacts. Any f stop lower than around f6 will give you this effect. The lower the f-stop the more blurry the background.

This is one of the main reasons I shoot manual. I don't want to sacrafice my aperture and blurry backgrounds for the sake of letting my camera choose the exposure.


Depth of field is so much fun to play around with.
Try lining objects up and change which one you focus on. Get in close to craft projects, highlight a particular area. Play around with natural light as well- this works really well with flowers.
Experiment with different f-stops. Go as low as you can.
I have even bought a seperate lens that can go as low as f1.8, just to get that lovely depth of field!


My challenge for you today:

Go out (or in if you are in england and it is probably raining) and play around with depth of field.
There is no right or wrong for this. If you have a go, do link up in the comments so we can all see your creations!

If you are not 100% comfortable with going full manual, most cameras have an "A" setting (aperture select). This means you can choose what f stop you want and the camera will deal with the rest of the exposure!

Have fun!

I apologise that most of these photos are of these two handsome men. They were the only willing models. Needs must hey!