Showing posts with label Sewing. Show all posts

11 August 2014

the finished quilt

This quilt has been in the works since Christmas but owing to uni work, revision etc, it wasn't until this summer that I really made it a priority to work on it.


There is something so special about going into a project knowing it will be a gift. Handmade is so precious. It is magical to think you are making something unique.

To make this quilt I used a jelly roll from Moda. These are strips of fabric that are designed to coordinate with one another. They are pre cut into 2.5" strips which is fab for those of us who are lazy cutters, (not that I am one of them, ahem.)


I tried a few new things with this quilt. First up was machine quilting it together. For this I used my darning foot on my machine. Rather than feeding the fabric through the machine, the darning foot just sends the needle up and down in the fabric so that you are free to move it as you will. A bit like drawing yet you are moving the paper rather than the pencil.


To keep it simple I just moved the fabric in big swirled patterns. I love the texture it gives.

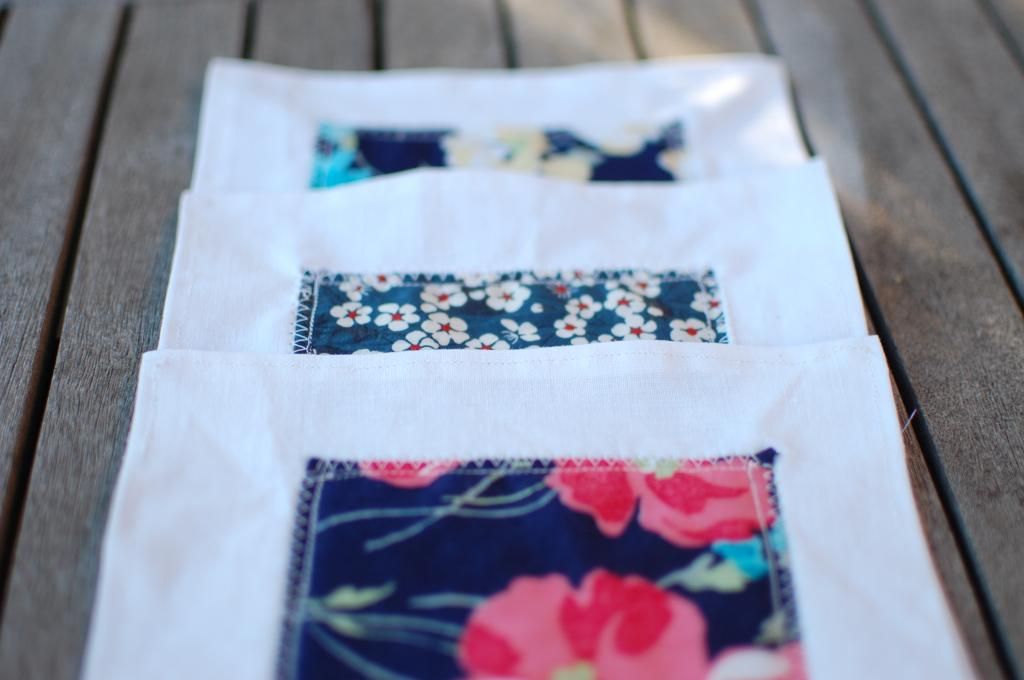
I also tried a strip piecing ( I think that is the term) technique to patchwork the top. This really speeded up the process and made the quilt look far more detailed and time consuming than it was!
Strip piecing is super simple:


Grab as many strips as you want in your row. Here I have demonstrated with five. Sew these together where I have marked the dotted lines. Press the seams.
Now cut these strips horizontally like so. Keep repeating this process with different combinations of fabric.
Now join these horizontal strips together again to make the square.
I am so pleased with how the quilt turned out. It is pretty large but all the more room for snuggling! 
One of my favourite parts of quilting is finishing off with the binding. I chose a very pale pink stripe because, a. it certainly didn't need any more bright colours and b. you can't go wrong with a stripe.


A finished quilt. All packaged up and delivered to a special friend. I have to admit I was sorry to see it go but her face when she opened the package was just the best!


Homemade. It can't be beaten.

12 July 2014

three ways with pretty fabric squares

I love big sewing projects. I have made a few quilts now and I love the process.
I am always left with scraps though. Scraps of pretty soft fabric that I want to use in something yet aren't substantial enough for a larger project. 


I decided to use these scraps to whip up a few pretty fabric squares that can be used in three different ways: 
  • The traditional hankie for your pocket. 
  • Napkins.
  • Half triangle bunting. 

This is the process and it is so simple it is almost a crime to have to write out the steps! 

1. Cut your piece of white fabric. You could use linen or cotton. I used white cotton. Cut it just bigger than desired. I cut mine at 7.5" for a finished square of 7". 


2. Carefully hem the edge of the fabric. I just turned a tiny hem over, about 1/4" and fed it through the machine using a straight stitch. 


3. Do exactly the same for your patterned fabric. I used a piece 4.5" squared but you could adapt this to suit your needs. Hem this piece too. I chose to hem it with white cotton as a contrast but you could use a cotton to match your fabric if you don't want the stitches to show. 

4. Place and pin your square in the middle of the white cotton. Using a straight stitch carefully stitch on top of that hemmed line on your patterned fabric. 


5. Now using a zig zag stitch place your sewing machine foot half on the patterned fabric and half on the white and sew around the edge. So simple! 


Here are three ways you can use these squares: 

Hankie: 
I think there is something beautiful about keeping proper cotton handkerchiefs in your pocket rather than a tissue. Because these have patterned fabric in the middle you could co-ordinate your hankie to your dress!
I also think a pile of these would work well at a wedding to coordinate with the colours of the day and for guests to take as you entered the church. 


Napkins: 
Depending on how big you made your fabric squares a pile of these at a summer event would be so much fun! I wrapped mine around cutlery to brighten up the wooden table. 


Half triangle bunting:
If you make enough of these, they can be folded in half and then sewn or pegged onto a string to create light and floaty bunting. 


Who knew fabric squares could be so versatile! I am excited to play with more of these this summer. 
What would you do with yours? 

13 July 2013

Painted stripe clutch

Sometimes I just have those urges to make something. Anything. My hands itch for the sewing machine and the pot of paint.


I had this lovely piece of linen lying around that I knew I wanted to make into something. I had picked it up for 50p in Laura Ashley. (Top tip, go into furniture stores and look out for the remnants or sample bins. If you can't find them ask for a sample of material and most shops will be happy to give it to you. I find this is a cheap or sometimes free way of picking up good quality heavy duty material like linen, canvas or curtain fabric.)

Whilst looking for something to do with it I stumbled across this tutorial for a clutch bag.
I loved the look of the metallic paint on the neutral material. I therefore found some silver acrylic paint and haphazardly painted vertical lines down my strip of linen.


I'm pretty pleased with how it turned out. A bit wonky perhaps but I feel it adds to the charm.

I then followed the tutorial to make the clutch. I used this lovely soft flowered fabric I had left from my quilt as the lining.


The making of the clutch was super simple. It really was as easy as folding the rectangle into thirds and then sewing the edges. I decided not to add a closure like in the tutorial but just to hold it closed.


The whole clutch is a little on the wonky side but it will be a fun and quirky accessory to take out on those summer evenings.

26 March 2013

Weaving some magic

There have been a few tutorials flying around the web recently about how to create a loom and weave on it. These are the two I followed most, here and here.


New crafts are fun I thought, so I headed over to our lovely next door neighbour who works wonders with wood and asked for an off cut.

I decided just to use a solid piece of wood rather than a frame and found this worked just fine. I then set about hammering nails into the top and trying not to hit my fingers. I placed my nails roughly half an inch apart along the top and the bottom. They aren't that straight but I'm afraid at this stage I was more concerned with getting the things in the wood!


I used string to weave around the nails and then used wool to weave in and out. The string was good in that it didn't give too much and pull the edges in but I didn't like the texture. I am creating another design at the moment where I used wool all over and I prefer this.


As said in so many of the tutorials, it is really easy to pull too hard at the end of each row which will create an hour glass shape. I found the easiest way to weave was to choose my length of wool and then thread it onto a large darning needle.


I didn't really follow any pattern or design when I was weaving. I chose my colours and worked with what felt right, trying different things along the way. I experimented with two colours and really liked how that turned out. It is very easy to experiment and equally easy to undo it when it all goes wrong!


This is such a tactile craft and totally mesmerising. It is also very addictive.

I don't quite know what I am going to do with these small pieces of material. There are ideas running around my head for some sort of blanket or maybe a patchwork? Who knows. For now it is fun and simple to sit and pull yarn over and under.


Have you tried weaving?

Tomorrow I am sitting down for a chat and a cup of tea again. Do pop on over tomorrow, say hello and tell me what is happening with you. See you then!

10 December 2012

DIY star garland

Each Christmas I try and make some sort of new decoration. I saw something similar to this in a shop the other day. It was one of those moments when you look at the price, nearly fall over and then think, "oh I could make that!"

So without further ado here is how to make your very own star garland. Super easy and fun. 

1. Cut out two star five pointed star templates. You could do any size you like. Just to give an indication of mine. The big star was 5.5" point to point and the small start was 3" point to point. 


2. Start with the white felt and cut out two large stars. Then with the red felt cut out one small star. 


3. Take one piece of the white felt and machine sew the red star to the middle of it. I have to admit mine are a bit wonky. In my opinion there is a time and a place for being neat and this wasn't one of them. It all adds to the charm friends! 


4. Pin this star to the other white star. Now you are going to blanket stitch all the way round. I suggest finding something good to watch on tv, grabbing yourself a large mug of tea and then set down to work. 

5. To blanket stitch, use a contrasting thread and push the needle in between the layers of felt so that the knot is hidden inside. 

6.  Then push the needle through the front to the back, next to the stitch you just made. 


7. Don't pull too tight so that there is a loop still showing. Push your needle through this loop from the back to the front. Voila. Blanket stitch.  


8. Go all the way around the star but leave one side open. 


9. I stuffed these stars to give them a nice puff. I wish I could say I stuffed them with nice stuffing. I didn't. I'm a student. I stuffed them with wool! The trick is not to overstuff, just put in enough to make them soft then blanket stitch the star up. 


10. I made another of this type of star and then made one in reverse colours. The choice is all yours though. 

11. For the smaller stars, grab your small template and cut out two stars from the same colour felt. Really simply pin them together and zigzag the edges on the sewing machine. 


12. To join the stars together decide on your order and then grab some twine or ribbon. Turn the first star over and lay the twine across the back like this and sew a few stitches on the end of each point.

A simple Christmas garland! Now just decide where to put it!


I am entering this into the art of crafts competition. I would be so grateful and would thank you with a virtual cup of tea and biscuits if you popped over to the Pinterest page and liked my pin. Thank you! 

This DIY is part of my 20 for 20 project!

25 September 2012

Tutorial- Zipped Purse

I love the look of oil cloth. It makes a project look very finished and professional and is fairly easy to use. 

A simple zipper purse seemed like a good thing to make and it was so cheap. Honestly, a couple of pounds! These purses are great for keeping your phone and keys in so they don't get lost in the depths of a handbag. ( Please don't tell me I am the only one who has this problem?) 


Supplies: 
I got 1/4 of a metre of oilcloth but used only a scrap of that so you will have lots left to play with! 
One 8" zip
Pins
Sewing machine 


A few things to remember about oilcloth: 
- Sewing is a bit trickier because the material sort of sticks to the machine. A bit more force is needed to push it through and a longer stitch length of 3-4 helps

-DO NOT iron your oilcloth- it melts. Just folding it hard will do! 


1. Cut two pieces out of your oilcloth both 6" x 8. You don't have to cut your material to this size but this fit both the zip I had bought and seemed roomy enough for my phone and keys.
 

2. Grab your first piece of material and place it right sides together with the top edge of the zip. Pin in place if it helps but as the oilcloth is sort of sticky it will hold onto the zip pretty well. 


3. Sew a simple running stitch along this top edge, getting as close to the zip as you feel comfortable. I turn the piece over to do this so I can see where the zip is. Don't' be afraid to go over it several times if you are not happy with your first attempt as you can see I did in the photo below. 


4. Open the material out and press. Carefully top stitch along this fold. This is quite tricky so take it slow but it will create a lovely finish. 


5. Do exactly the same with your other piece of material and the other side of the zip. Right sides together, sew close to the zipper and then top stitch. When finished it should look like this: 


6. Undo your zip to about half way. Put the two pieces right sides together again and pin in place. 


7. Sew all three sides. The bottom and both sides right up to the zip. 

8. Undoing the zip to halfway means that you have a hole to turn the purse the right way round. Before you do this snip the bottom corners like this to make turning easier. 


9. Turn inside out and there you have it! A nice new purse to fill with make-up, keys, coins, you name it! 

Thanks for stopping by! 

This Post is part of my 20 for 20 project; twenty handwritten tutorials before I turn 21.